

Cute Holiday Nail Art Designs & Tutorials with Detailed Steps
Posted by FAZEELA HUSSAIN
The post Cute Holiday Nail Art Designs & Tutorials with Detailed Steps appeared first on StylesGap.com.
Dear holiday people or the people who are anxiously waiting for holidays to come again this year and fill their lives with special entertainment. There are so many holiday activities that mostly includes friends & family hangouts. Young guys, as well as girls especially, have so much to do in holidays. Dear girls! Today I have come up with your holiday treat. Nails that people don’t sometimes assume much important are of great importance for young girls as they so conscious about nail paints & arts. As I said that I have brought you a holiday treat today so that gift is amazing & gorgeous nail art designs & tutorials where you will learn the complete how know of the drawings. Immerse yourselves in a holiday spirit and let your beautiful, cute nails talk.
So are you ready to party with your nails? You are just the tutorials below away to become an expertise of doing with nails.
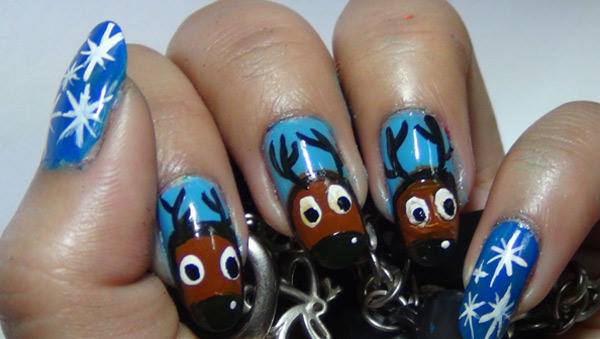
Stars & Reindeer holiday nails:
Reindeers are adorable for evening parties. Things you need in this nail art are base coat, white nail polish, dark blue nail polish, light blue nail polish, a toothpick, nails art brush, acrylic colors in white, black & brown, a transparent polish.
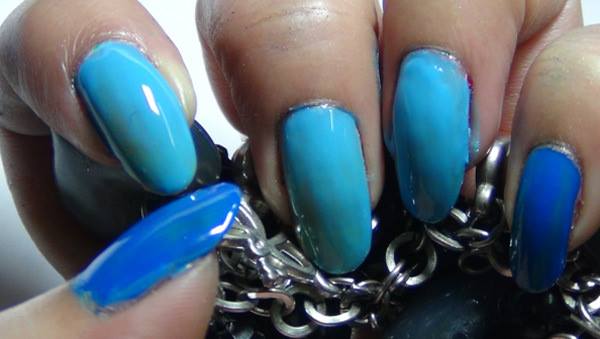
Step 1:
Create a base coat and let it dry than applying white nail polish to make the base look more opaque. Once the white nail paint has dried, use two of the blue shades as shown in the image.
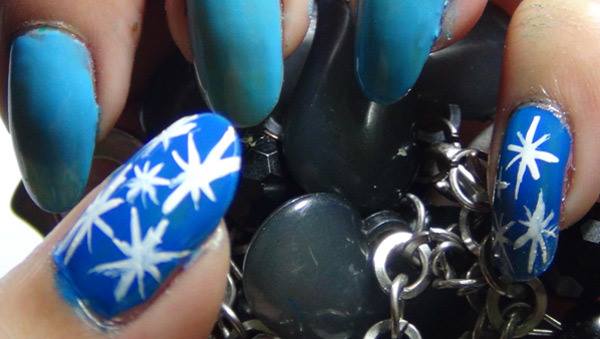
Step 2:
Now let’s move on to the main design. Make some star designs on your nails with brush using white acrylic paint. For avoiding the confusion, I am posting the picture of the design below.
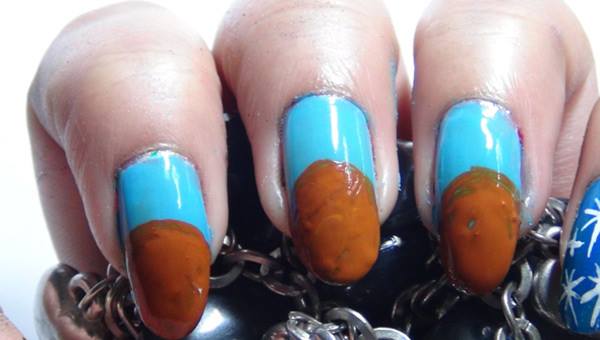
Step 3:
Take brown acrylic paints and make heads of reindeers on the light shade of blue as shown below.
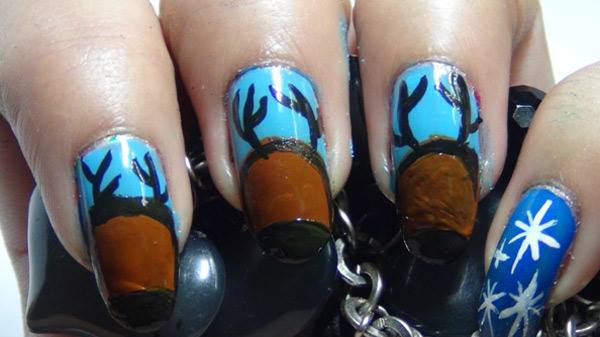
Step 4:
Finally, it’s time to make horns with black acrylic paint, also make the nose & give an outline to heads.
Step 5:
Then makes the eyes with any dotting tool like the toothpick or else using white acrylic paint & then make eyeballs with a slight smaller tool. Your design is complete now, let it dry properly before you apply the transparent coat.
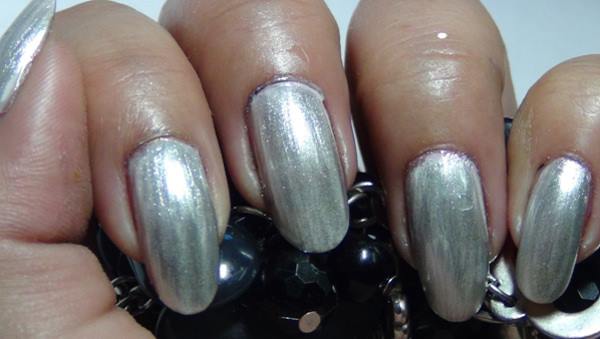
Christmas Candy & Mistletoe Holiday Nails:
This design is a masterpiece of winter holidays. You don’t necessarily need to wait for the Christmas, but it will look good casually in the winter season. Things you require for this design are base coat, white nails polish, silver polish, red & green paint, green & black acrylic paint, red round rhinestone, transparent polish & nails art brush.
Step 1:
Create a base coat to make your nails resistant to breakage or chipping. Again use white polish to make the base more opaque. Then apply a layer of silver nail polish on it and let it dry.
Step 2:
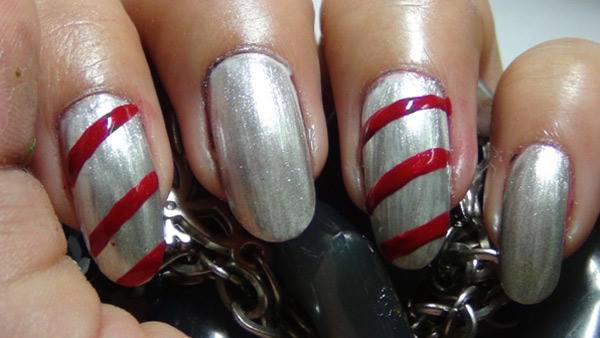
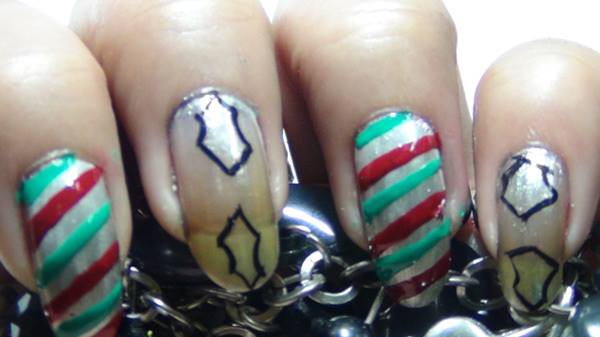
Get your thin nail art brush and make diagonal strips using red nail polish just like ones shown in the figure.
Step 3:
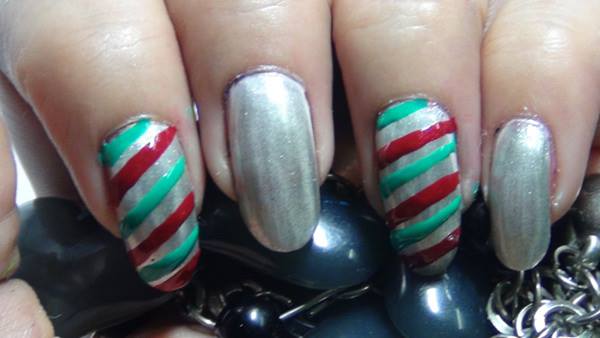
When done with red, make green strips in the same way but remember to clean your brush before doing that and here you are done with your Christmas candy.
Step 4:
Now it’s time to make mistletoe on the thumb, second finger, and tiny finger. Use black acrylic paint & a thin nail art brush to make patterns of leaves like the ones in the image.
Step 5:
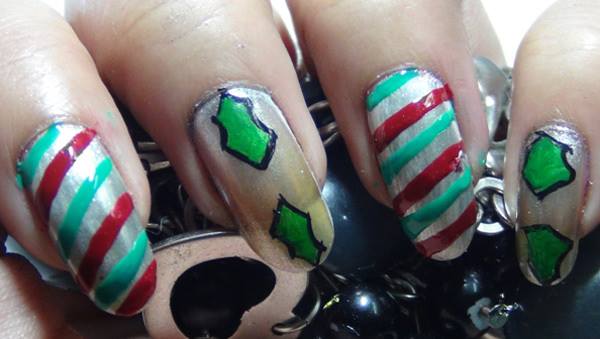
Use green color to fill the inside of leaves making a central demarcation that will represent the vein of the mistletoe.
Step 6:
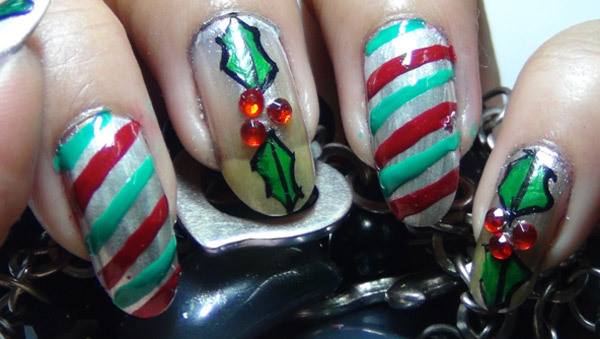
With the help of tweezers & transparent nail polish, place three rhinestones on the center distance b/w the leaves. Apply the top coat after the previous one is completely dried, and you are on with another amazing & sophisticated nail art design.
Hope you like these tutorials so much & completely got the way to perform them on your nails. We will see you with much other stuff related to fashion & tips soon. Keep visiting us.
See More As:
- Holiday Christmas Nail Art Trends, Designs & tutorials with steps
- Step by Step Cute Nail Arts To Spice Up Your Christmas Eve
- How to Get Ombre Nails at Home- Easy Tutorial with Steps
- How to get Perfect French Nails at Home- Step wise Tutorial
- Beautiful & Romantic Valentines Day Nail Art Designs & Ideas
The post Cute Holiday Nail Art Designs & Tutorials with Detailed Steps appeared first on StylesGap.com.


