

How to Install Windows 10 IoT on Raspberry Pi 2 [Guide]
Posted by HAAMIZ AHMED
Have a Raspberry Pi 2 lying around? Why not tinker with it some more and install Windows 1o on it?
As it turns out, there’s a Windows 10 IoT (internet of things) variant that is custom-tailored for your Raspberry Pi device. With the increasing popularity of the Pi among hobbyists and engineers looking for small projects, it’s something that you could definitely use.
About Windows 10 IoT Edition
As TechRepublic explains:
It’s not Windows as most people understand it. A fresh install of Windows 10 on the Raspberry Pi doesn’t boot to the familiar Windows desktop. Instead, Windows 10 IoT Core will show users a single full-screen Universal Windows app.
There are several videos available on YouTube explaining step by step how to install Windows 10 on your Raspberry Pi but not all of them explain the steps in detail.
Follow these steps to have Windows 10 running on your Raspberry Pi 2 properly:
Step 1
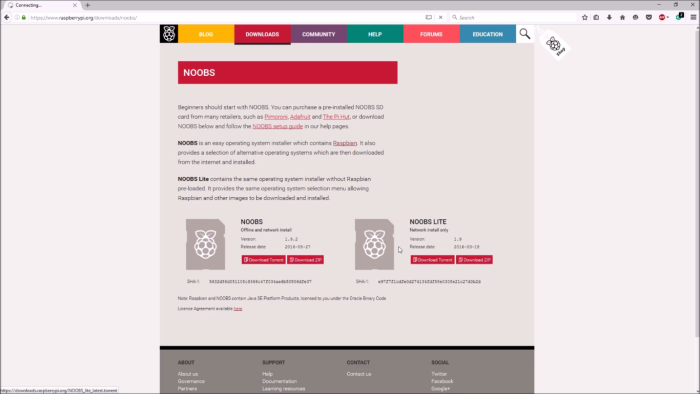
Download noobslite from the Rasbperry Pi downloads page by clicking on ‘download as zip’.
Step 2
Download and run sdcard formatter. Click on Options and set format type adjustment to ON.
Make sure your Raspberry Pi is connected to your PC before formatting.
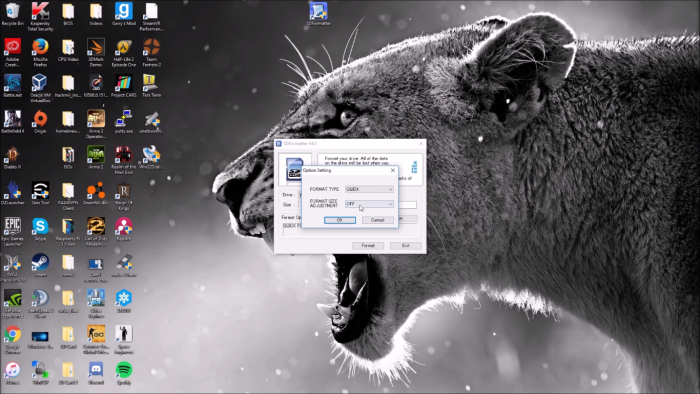
Click on OK on the warning prompts and you’re done formatting.
Step 3
Copy the files from the noobslite zip file you downloaded earlier into the sdcard (Raspberry Pi 2).
Make sure you’ve connected the Raspberry Pi to the internet via an ethernet cable as installing via wifi doesn’t work.
Connect the power and boot up the Pi.
Step 4
Choose the right language and region. You can then click on Windows 10, then on Install.
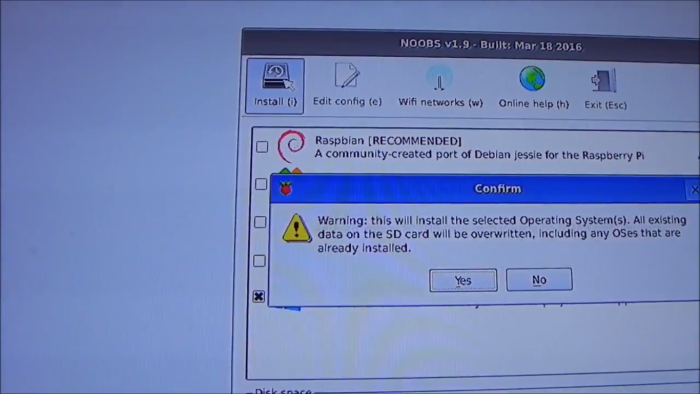
Click on ‘Yes’ to agree to the license agreement, then click on OK on the next prompt.
It will then ask you to sign in to your Microsoft account. Use your Microsoft ID here to proceed.
Step 5
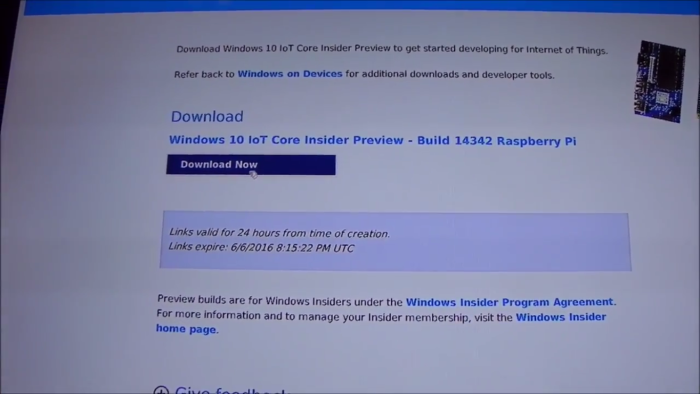
After you’re done signing in, it will ask you the edition and the device you want to install it on.
Choose the edition you want (depending on the board you have), and choose Raspberry Pi from the drop down menu.

Next click on the Download Now button and the installation will continue.
Final step
After the installation finishes, you can choose your language.
Click on Next, and viola! You’ll be booted up into Windows 10 on your Raspberry Pi.
How you plan to use the Raspberry Pi with Windows 10 is up to you but we imagine that a whole new world of possibilities awaits you and your IoT-powered Raspberry Pi. Enjoy.
The post How to Install Windows 10 IoT on Raspberry Pi 2 [Guide] appeared first on .


