

What Is Guided Access on iPhone and How Do You Use It?
Posted by SANDY WRITTENHOUSE

Have you ever handed your child your iPhone to play a game, and they somehow opened your Mail app instead? Or maybe you were working hard on a project, but got delayed because of distracting notifications on your iPad?
There’s a quick and easy way to stop these types of situations from happening. It comes in the form of Guided Access for iPhone and iPad. This handy feature limits what you can see on the screen, as well as what you can tap. Here’s how to set up and use Guided Access on iOS.
What Is Guided Access on iPhone and iPad?
As we introduced, Guided Access is feature that limits what you can see and tap on your iOS device’s screen.
The limitation includes a single app. Thus, during a Guided Access session, you can’t view, open, or use any other apps on your device.
In addition, you can prevent certain areas of the screen from being tapped. This is ideal if the app has banner ads at the top or bottom. It’s also helpful for eliminating the ability to tap notifications you’ve set up to display at the top of your screen. One more use for the feature is when you’re teaching someone to use an app that has a lot of buttons to tap—you can limit them to only the ones they really need.
Now that you know what Guided Access is and how it can help, let’s move onto setting up a session.
How to Set Up a Guided Access Session on iPhone and iPad
Setting up a Guided Access session is almost identical on iPhone and iPad. Here’s how it works:
- Open Settings > General > Accessibility.
- Scroll to the bottom and tap Guided Access.
- Move the slider to enable Guided Access.
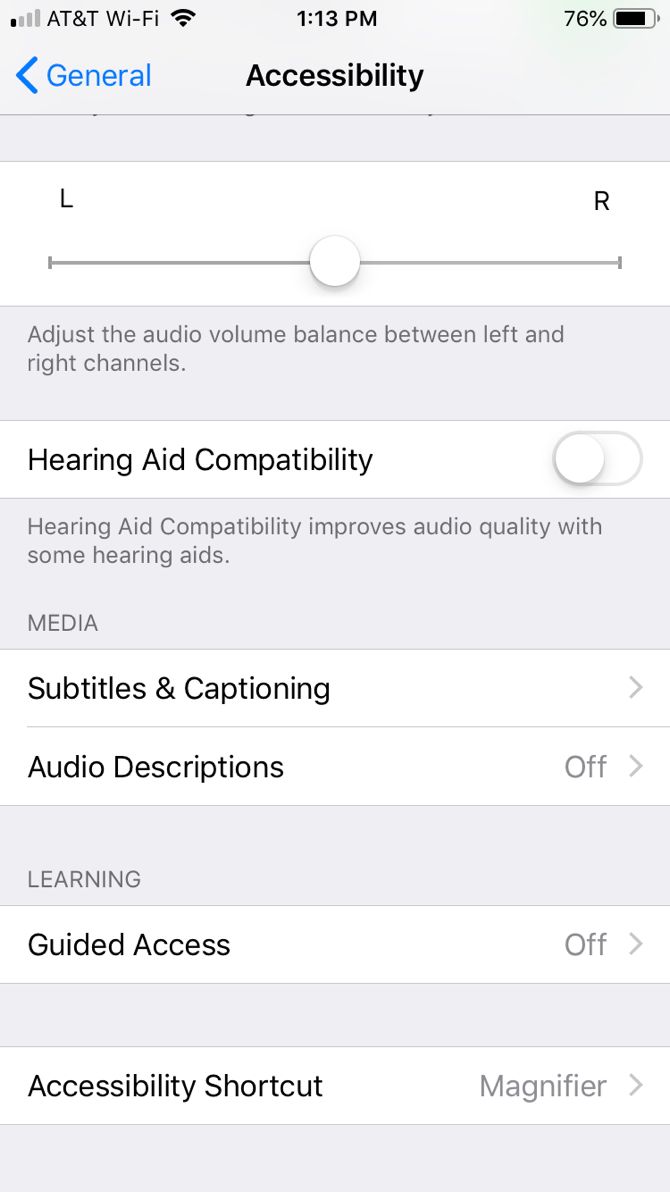
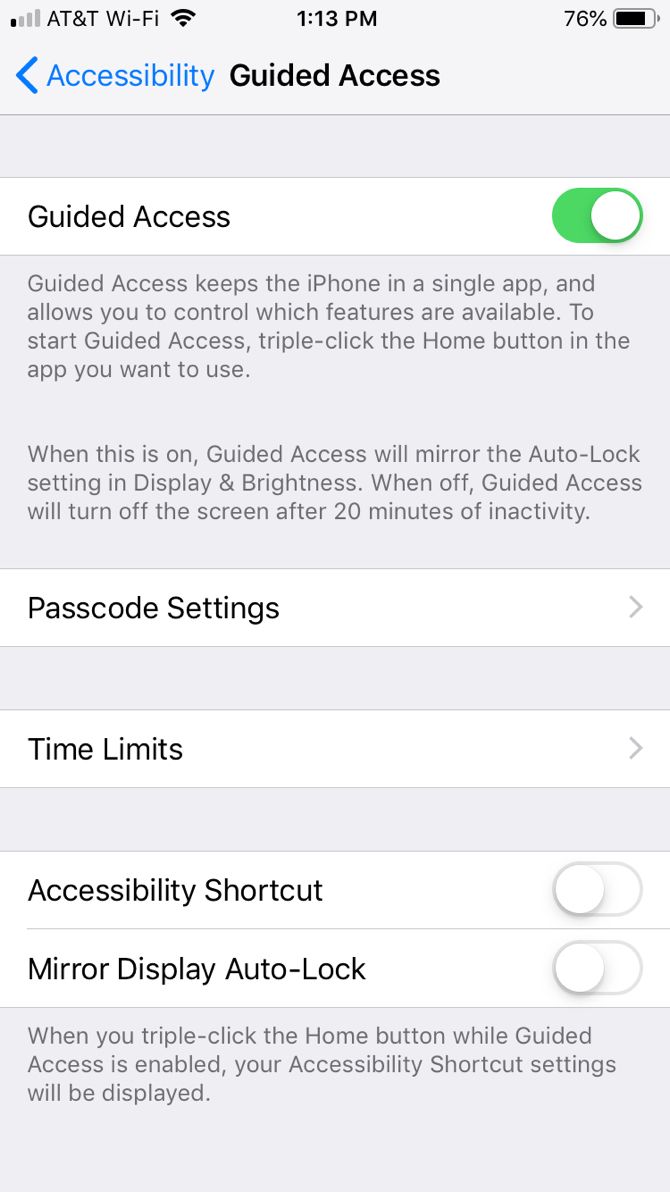
Enabling the feature does not mean that your Guided Access session has started. You’ll need to take an additional action to begin. Before you do that, take a look at these additional settings that you can now see:
- Passcode Settings: Set a specific passcode for Guided Access, or use Touch ID (or Face ID) for a session.
- Time Limits: Set an alarm sound and/or have the time remaining in the session spoken aloud before time ends. This only applies if you use a time limit for the session (see below).
- Accessibility Shortcut: When enabled, accessibility shortcuts will display if you triple-click the Home button (on iPhone X or later, the Side button) during a session.
- Mirror Display Auto-Lock: When enabled, Guided Access will match your auto-lock settings in Display & Brightness.


How to Use Guided Access
When you’re ready to start a Guided Access session, open the app that you want to use during the session. Remember, it only works with one app at a time.
Triple-click the Home button to start your session, or on iPhone X or later, use the Side button. You can also ask Siri to help you out by saying “Turn on Guided Access.”
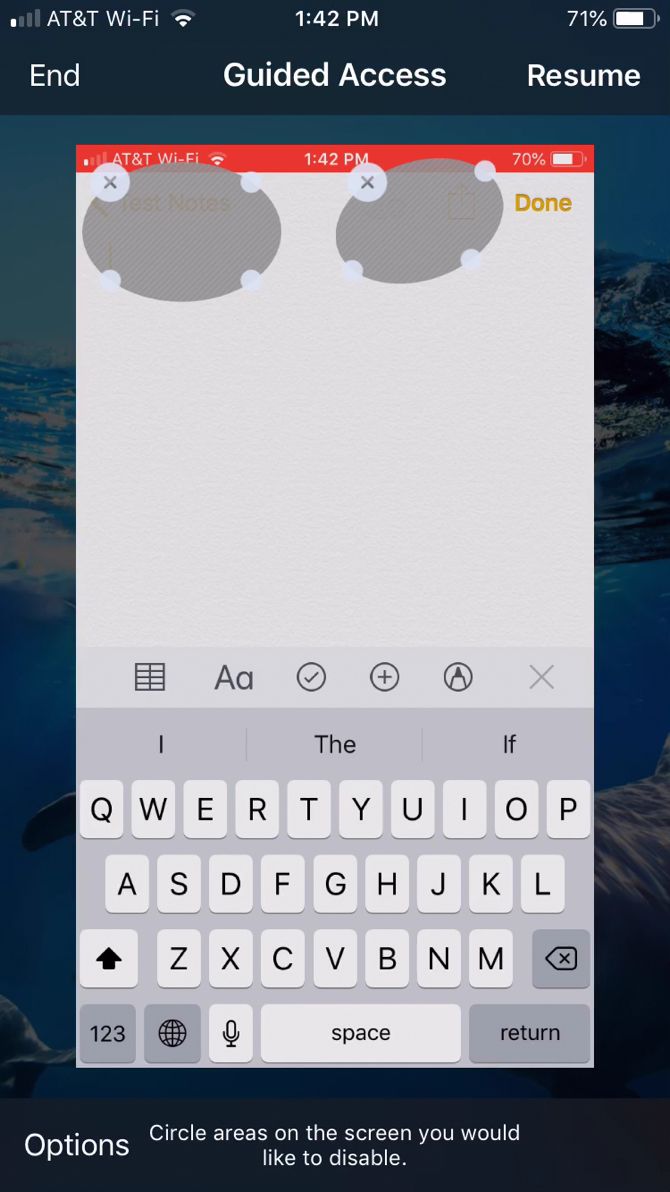
You can then tap Start at the top-right to begin your session immediately. Alternatively, take a moment to explore the Options available for your session.
Options Available for Guided Access
- Sleep/Wake Button: Turn on or off the Sleep/Wake button ability.
- Volume Buttons: Turn on or off the volume buttons.
- Motion: Allow or disallow motion such as screen rotation.
- Keyboards: Turn on or off the keyboard.
- Touch: Allow or block screen touches.
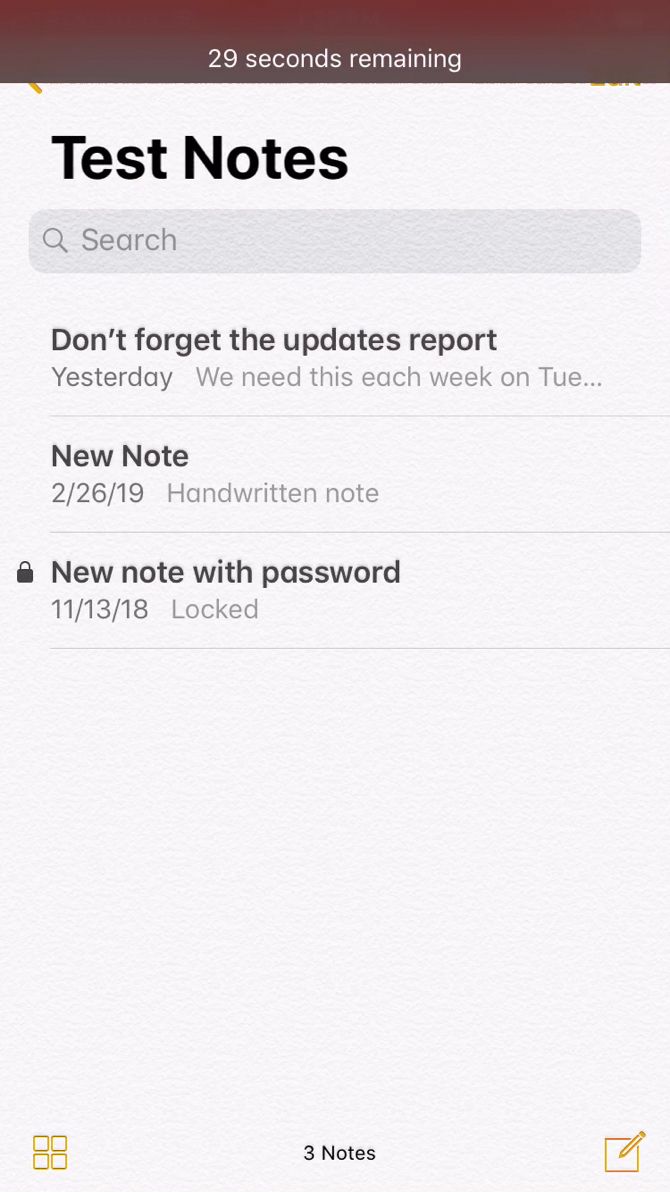
- Time Limit: Enable and set a time limit for the Guided Access session.


You will notice a tip on the Guided Access screen, explaining that you can “Circle areas of the screen you would like to disable.” This is useful for keeping yourself or others from tapping certain parts of the app or screen during the session. Simply use your finger to circle the areas you want to disable and you’ll see a shape display which you can make larger or smaller, as well as move or delete.
How to End a Guided Access Session
If you set up a time limit in the Guided Access Options area, the session will end when time is up. You’ll see a notification asking you to triple-click your button to enter your passcode.

You can also manually end a session at any time by triple-clicking your Home (or Side) button and entering your passcode. Remember, if you set a specific passcode for Guided Access, you’ll need to enter that one. If you did not, then you’ll need to enter your device passcode.
Alternatively, if you enabled the feature when you turned on Guided Access, you can double-click the Home (or Side) button and use Touch ID (or Face ID).
Notes on Guided Access
Here are a few extra points to keep in mind when using Guided Access:
- If you don’t see Options on the Guided Access screen, try triple-clicking your Home (or Side) button again and entering your passcode.
- When you use Guided Access in your app of choice, you’ll notice that areas you circled and options you set earlier will carry over to a new session for that app. This is convenient, as you don’t have select these items again.
- You can change the options you use for a session partway through if needed. End the session as described above, then tap Options to make your changes. Once satisfied, select Done, then tap Resume to continue the session.
Don’t Forget About Screen Time
While different than Guided Access, Screen Time is a similar feature Apple introduced to help control device usage. You can use Screen Time on your iPhone and iPad to limit the time you spend on your device, restrict certain apps, block content, and set daily limits.
If the main reason you want to give Guided Access a try is to limit distractions when using your device, take a look at what Screen Time has to offer in our guide.
Guided Access on iPhone and iPad Can Come in Handy
For those situations mentioned earlier, and probably many more, Guided Access can be a handy tool. Just don’t forget that it’s there on your iPhone and iPad the next time you need it.
For other features of your device you might have overlooked, take a look at these secret iPhone features to impress your friends or some iPhone emergency features that can save your life.
Read the full article: What Is Guided Access on iPhone and How Do You Use It?


