

How to Watch Netflix, Amazon Video, and Plex With Raspberry Pi
Posted by CHRISTIAN CAWLEY
Maybe you’ve tried turning your Raspberry Pi into a media center with Kodi, and maybe you found it a bit disappointing. You don’t want to use illegal streaming add-ons, but without them, very little else seems to work other than YouTube and a few specialist channels.
What you really want is to install Netflix, Amazon Video, and much more on your Raspberry Pi. Perhaps even Plex for accessing content on your home network. Want to know how to do that instead? Here’s what you need to do.
You Need a Raspberry Pi 3
Before you go any further, make sure you’re using a Raspberry Pi 3 (or even a Raspberry Pi 3 B+) for this. While the Raspberry Pi 2 is okay, the later models are superior for streaming and decoding data from Netflix and Amazon Video.
Raspberry Pi 3 Model B Motherboard Raspberry Pi 3 Model B Motherboard Buy Now At Amazon $34.99The same goes for the Pi Zero. These compact versions of the already small Raspberry Pi are good, but they’re not quite good enough for this project. If you’ve ever tried to get Netflix or Amazon Video add-ons working on a Raspberry Pi-based Kodi box, you’ll know how tricky (and frustrating) it can be.
Typically, these problems are due to a combination of poor add-ons (or ones that will only work with desktop PC Kodi installations) and the low spec of older Raspberry Pis. If you’re using a Raspberry Pi 3, the following steps will allow you to access your existing Netflix and Amazon Video subscriptions via Kodi.
Install Kodi on Raspberry Pi With OSMC
You’ll need to get started by choosing the right version of Kodi for your Raspberry Pi. As you may know, several Kodi versions are available for Raspberry Pi, but to get Netflix, Amazon Video, and Plex working with minimal effort, you’ll need to use OSMC (Open Source Media Center).
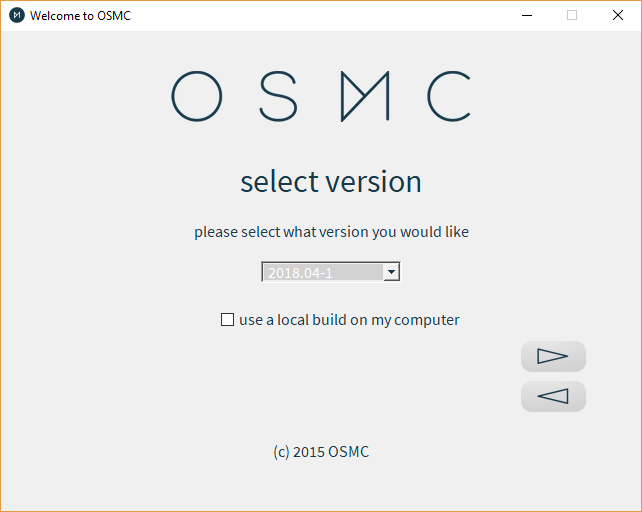
Available from osmc.tv, you’ll need to download the installer file for Windows, Mac, or Linux. This automates the process of writing OSMC to your microSD card. Alternatively, download the disk image and install in the usual way.
Once installed on the card, you’re free to insert the card in your Raspberry Pi, connect it to your local network (use Ethernet for now, you can set up Wi-Fi once everything is configured) and your TV’s HDMI port, and connect the power cable.
Downgrade OSMC for Better Stability
Although you have installed OSMC, a very specific version that isn’t available to write as an image to your microSD card is required. This “nightly build” is stable enough to run the Netflix add-on which you’ll install later.
First, open the Terminal or connect to OSMC via SSH and enter:
sudo nano /etc/apt/sources.listIn the file, append this line to the bottom; this adds a new source.
deb http://download.osmc.tv/dev/gmc-18 gmc-18 main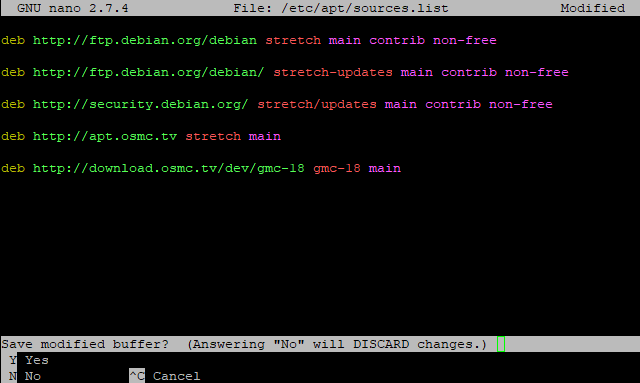
Press Ctrl + X to save and exit. Next, add the GPG certificate to validate the source:
wget -qO - http://download.osmc.tv/dev/gmc-18/gpg.key | sudo apt-key add -The next step is to update the sources list:
sudo apt-get updateYou can then run a kernel upgrade:
sudo apt-get dist-upgrade -yFollow this by downgrading to build 17.8-225.
sudo apt-get install rbp2-mediacenter-osmc=17.8-225 -yThis may take a while, so be patient. Once this is complete, install the following dependencies:
sudo apt-get install python-pip python-crypto build-essential -y
sudo apt-get install python-all-dev python-setuptools python-wheel -y
sudo apt-get install python-crypto-dbg python-crypto-doc python-pip-whl -y
These dependencies will ensure that everything you’re about to install will work as intended.
Install and Configure Plex for Local Media Streaming
Want to stream video, music, or photos from another device on your network? You’ll need the Plex server installed on your PC, and the client add-on installed on your Raspberry Pi.
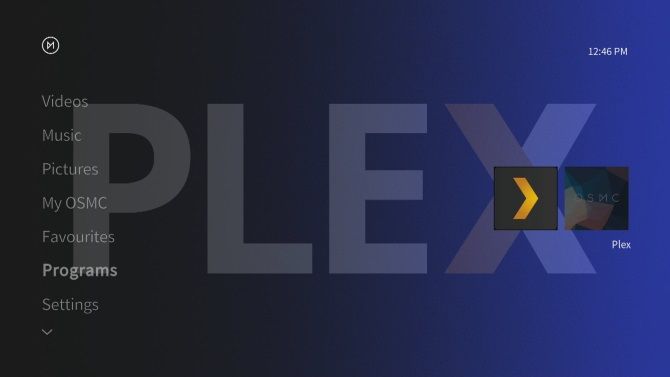
With OSMC running on your Raspberry Pi, browse to Settings > Add-on browser > Install from Repository > Video add-ons. Scroll through the list until you find Plex, select, and Install. Click OK to confirm, and wait while this finishes.
Once done, use the Restart option to reboot the Raspberry Pi.
While that’s happening, check our Plex guide for information and tips for this great streaming solution.
Install and Configure Amazon Video on Raspberry Pi
Want to stream Amazon Video on your Raspberry Pi? Here’s what you need to do.
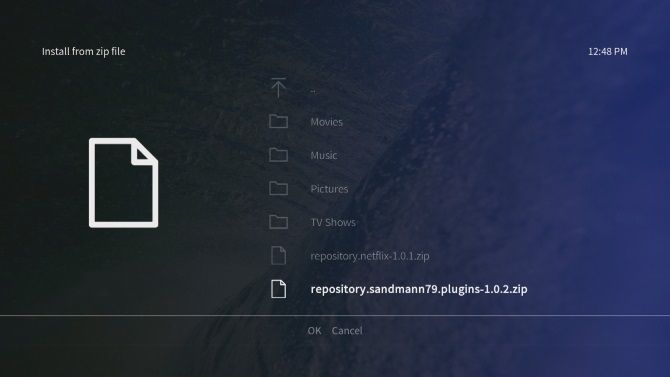
Staying in the terminal (or SSH client), it’s time to install the Amazon Video add-on. Begin using a wget command to download the ZIP file directly from GitHub:
wget https://github.com/Sandmann79/xbmc/releases/download/v1.0.2/repository.sandmann79.plugins-1.0.2.zipWith this done, switch your attention to your TV and navigate to Settings > Add-on browser > Install from Zip File. Here, select Root filesystem, then find your way to home > osmc > repository.sandmann79.plugins.
Select this, and wait as it unpacks, then browse back and find Settings > Add-on browser > Install from repository. Go to Sandmann79s Repository and find Video add-ons. From here, select Amazon VOD (the alternative called “Amazon” is for German users).
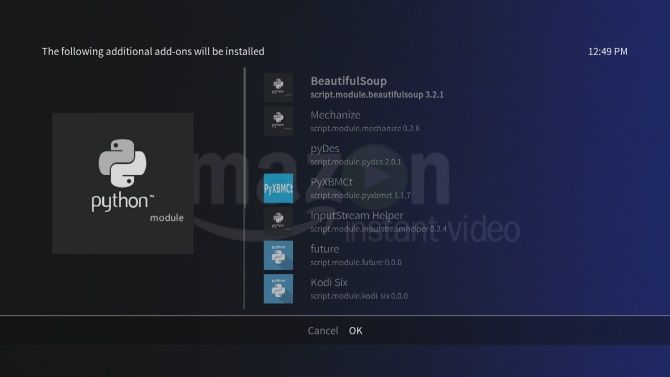
Select Install, then confirm with OK. Note that some additional add-ons will be installed (see above image). Leave it to finish, then reboot your Raspberry Pi. When it restarts, it’s time to configure the add-on. Browse to Settings > Add-on browser > My Add-ons > Video Add-ons, and select Amazon VOD.
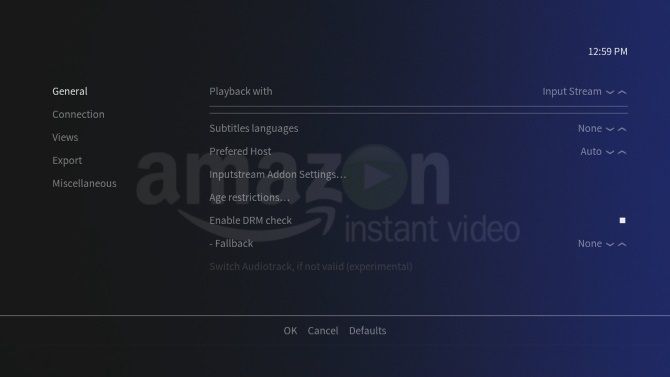
Go to Configure, and in the General view change the Playback option so that Input Stream is selected. Then, in the Connection view, select Sign In and input your Amazon account credentials.
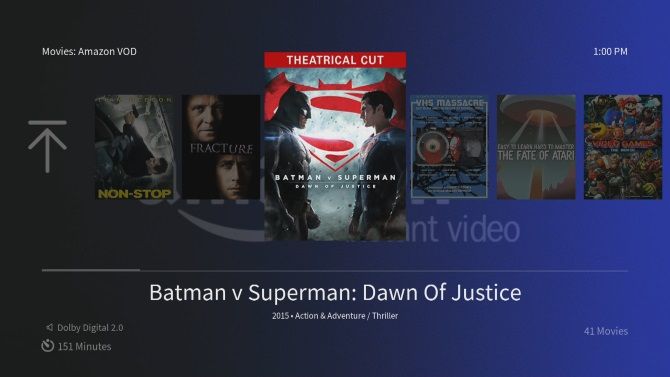
With this done, you’ll be ready to watch Amazon video content! You’ll find Amazon VOD listed under Add-ons.
Install and Configure Netflix on Raspberry Pi
Let’s look at streaming Netflix on the Raspberry Pi next.
To install a Netflix client on your Raspberry Pi, you’ll need to perform some minor configuration first. In the terminal, enter:
pip install pycryptodomexThis is a dependency required to run Netflix. The add-on needs to know where this is, so add a symbolic link:
sudo ln -s /usr/lib/python2.7/dist-packages/Crypto /usr/lib/python2.7/dist-packages/CryptodomeNext, download the add-on itself from GitHub.
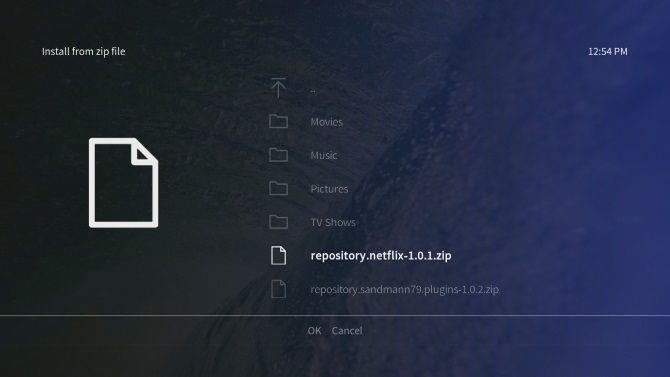
wget https://github.com/kodinerds/repo/raw/master/repository.netflix/repository.netflix-1.0.1.zipReturn your attention to the TV, and browse to the ZIP file: Settings > Add-on browser > Install from Zip File. Under Root filesystem, find home > osmc > repository.netflix-1.0.1.zip, and select Install.
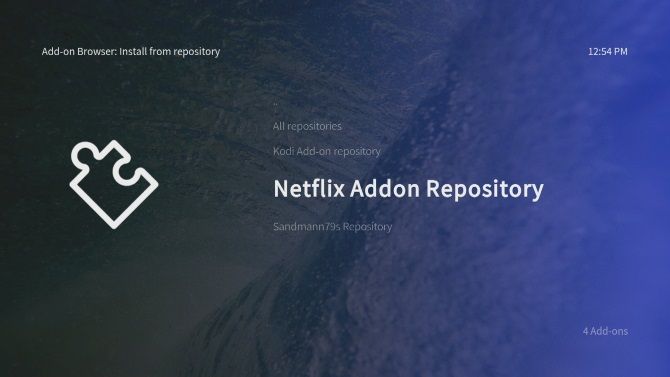
Wait for the notification, then go back and browse to Settings > Add-on browser > Install from repository > Netflix Addon Repository, and then Video add-ons. Here you’ll find Netflix; select Install, choose the most recent version, then OK.
With this done, restart your Raspberry Pi. When it reboots, you’ll need to configure the add-on with your Netflix credentials.
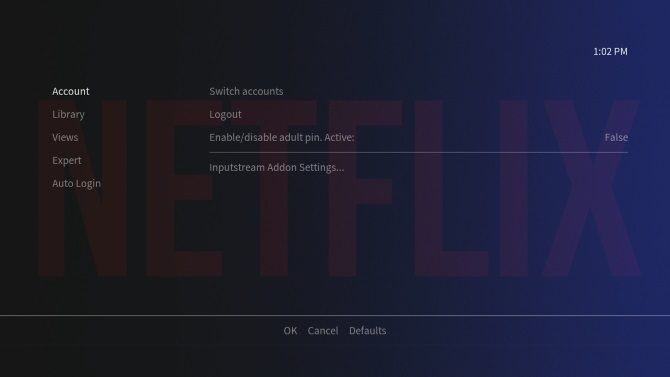
Open Settings > Add-on browser > My add-ons > Video add-ons > Netflix, select Configure, then find Account. Under Switch Account, enter your credentials.
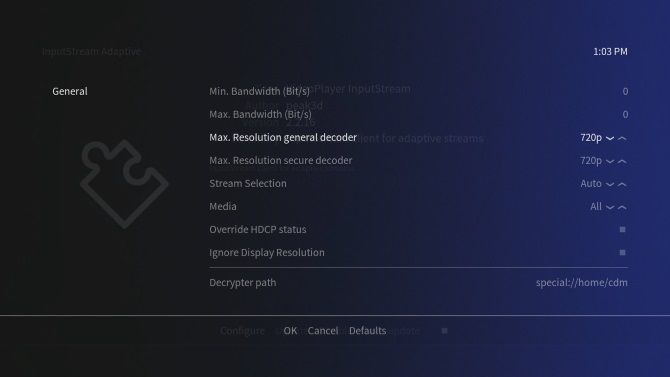
You’ll also need to configure the InputStream module. In Settings > Add-on browser > My add-ons, find VideoPlayer InputStream and select InputStream Adaptive. Choose Configure, then set Max Resolution General and Secure Decoders so that they match the resolution of your TV. Click OK to confirm, and exit.
Lastly, Install and Configure Widevine CMD
So far, you’ve installed Plex, Amazon Video, and Netflix. You’re almost set, but before you can watch anything, the Widevine CMD decryption module must be downloaded. You cannot do this manually, however; instead, it needs to be done by the Amazon or Netflix add-on.

Choose either add-on, select a video, and play. You’ll instantly be notified that the Widevine CMD needs to be downloaded. Note that as this is a proprietary module, it is not open source.
Select Install Widevine, and follow the instructions to download the Chrome OS recovery image from which the Widevine CMD is extracted (the recovery image will be automatically discarded later). This can take a while to download and extract, so let the Raspberry Pi work at its own pace.

Once Widevine CMD is installed, it’s a good idea to reboot your Raspberry Pi 3 one last time.
Your Raspberry Pi Is Now the Ultimate Media Center
That’s it: you can now stream Netflix and Amazon Video on Raspberry Pi, and it can easily stream video from another computer on your network via Plex. In short, your Kodi-based Raspberry Pi media center is awesome again.
Meanwhile, if you’re concerned about using a VPN with your Raspberry Pi, OpenVPN is preinstalled with OSMC, which is straightforward to configure. Almost all of the best VPNs provide OpenVPN compatibility.


