

How to Update Your iPhone: iOS, Apps, and Data Backups
Posted by BEN STEGNER

If you need to update your iPhone, you’ve come to the right place.
Like everything on iOS, keeping your iPhone up to date is pretty simple. You have a few ways to back up your phone and apps, depending on how you prefer to work with your iPhone. We’ll show you what you need, especially when it’s time to update iOS.
Before You Begin: Clean Up and Back Up
Now is a good time to clean old files off your iPhone. This will help your backup and update installation complete more quickly.
You can find low-hanging fruit by visiting Settings > General > iPhone Storage. Here, your phone will recommend a few actions to clear a large amount of space in a short time. Check out our guide to managing your iPhone’s storage for more details on how to clear up photo, app, and other clutter.
Before you make any changes, you need a backup. There are two ways to back up your iPhone: using iCloud or iTunes. Neither is perfect, but they are easy to perform.
1. Backing Up via iCloud
Unless you’ve paid for more iCloud storage, backing up your phone to iCloud is not a viable option for most people. Apple only provides 5GB of free iCloud space, which is likely far less than what’s on your phone.
Check out the iCloud pricing page for a breakdown. You can get 50GB for $1/month, 200GB for $3/month, or 2TB for $10/month. You can also share the larger two plans with family members, which is one of the best uses for extra iCloud storage.
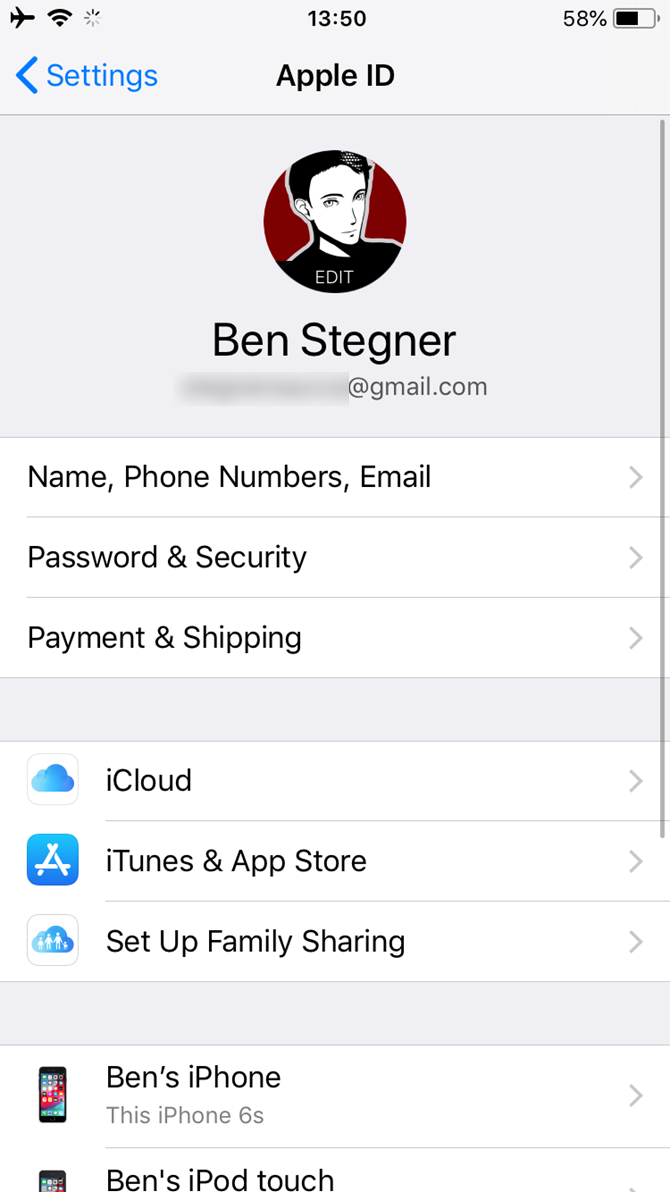
To turn on iCloud backup, open Settings on your iPhone. Tap on your name at the top to open your account management, then select iCloud. At the bottom of the Apps Using iCloud section, tap iCloud Backup.
Toggle the slider to enable it; a popup will warn you that your phone will no longer automatically sync with iTunes. After that, tap Back Up Now. A progress bar shows, telling you how long you have to wait.
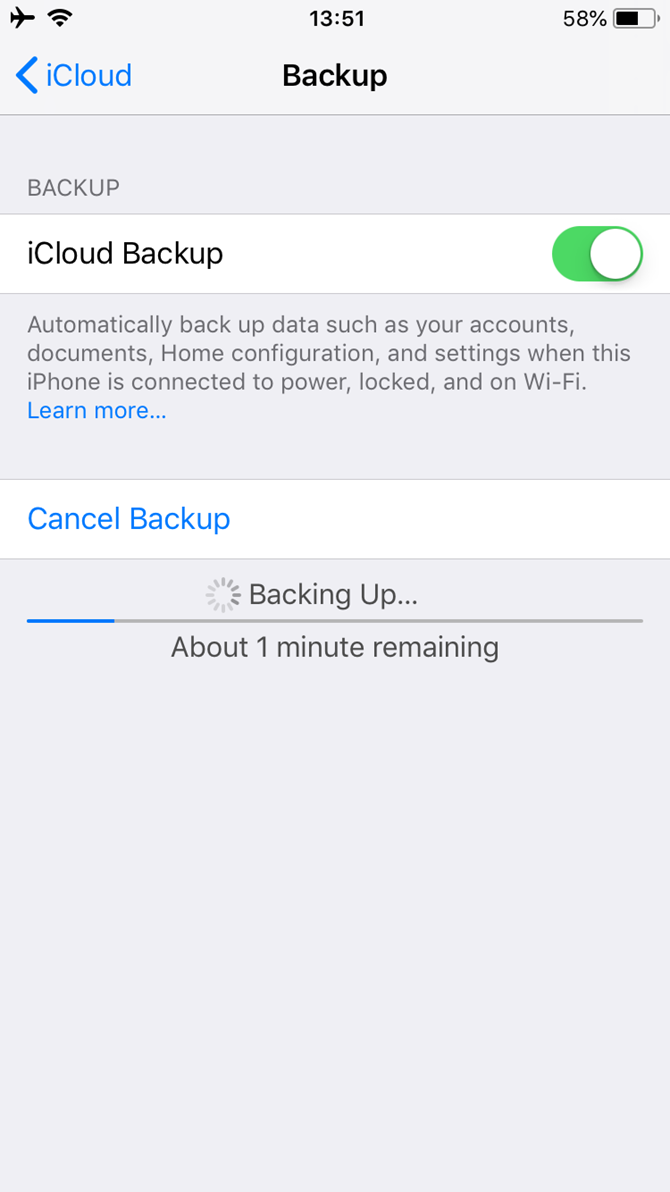
Once that completes, you can move onto the next steps. If you’ve already turned on iCloud backups in the past, you can tap Back Up Now to make sure iCloud has the latest copy of your data before moving on.
2. Backing Up to iTunes
Backing up to iTunes does not require much setup. Plug your phone into your computer, and launch iTunes if it doesn’t appear automatically. If this is your first time connecting this device to iTunes, you’ll need to accept a prompt on your phone to trust the computer and enter your passcode.
Wait for the device button to show up in the toolbar (in the top-left next to the Music dropdown). Select that button to go to the main device page in iTunes (you may need to click your phone’s name at the top too).
The second table on the device page is Backups. On the left are the two options for automatic backup: iCloud and This computer. Select This computer to ensure that your iPhone backs up every time you plug it in.

If you check the option Sync with this iPhone over Wi-Fi in the Options table below, your phone will back up whenever it’s plugged in. If you want your backup to include all your passwords and accounts, you need to select Encrypt iPhone backup and set a password for it. This an extra step, but saves you time if you ever need to restore your phone.
Click Sync at the bottom of the window if you need to transfer data to or from your phone; otherwise just click Back Up Now. (If you’ve made any changes to the settings on your iPhone, you need to click Sync to update them.)
Over-the-Air vs. Wired Updates
Deciding whether to apply an update on your iPhone, or to use iTunes, depends on a few factors. The first and most vexing is having enough free space on your phone to update. While you can free up space on your iPhone to make room, it’s often a lot easier to use iTunes instead.
There are some other catches. Your phone won’t even start downloading the update unless you connect to Wi-Fi. Plus, your battery level must be over 50 percent, or iOS asks you connect to power before updating.
Updating over-the-air (OTA) with your iPhone is convenient, but is still an “in-place” upgrade. If you’ve had any weird performance issues, you should probably install the full OS via iTunes. An OTA update installs only the changes.
In general: iTunes updates are more work, but have the least amount of restrictions. Updating iOS from your iPhone is easier, but has stricter requirements.
Updating on Your iPhone
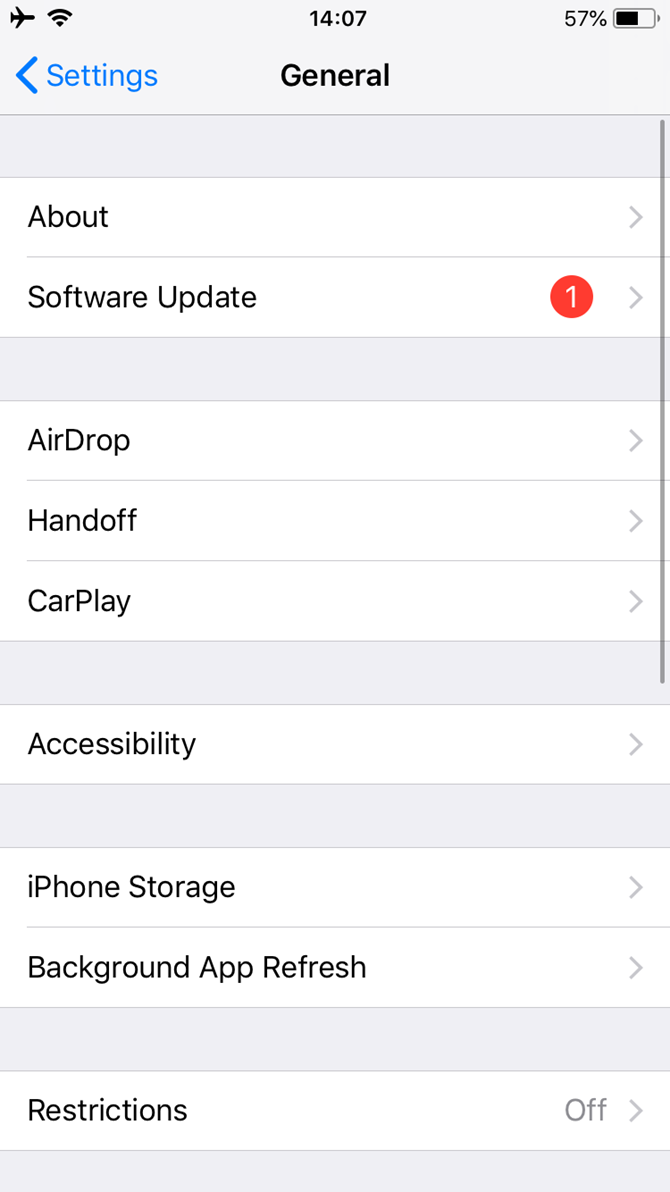
Installing an update within iOS is a simple process. Open the Settings app and select General > Software Update. You’ll see the details of the update on the next screen.
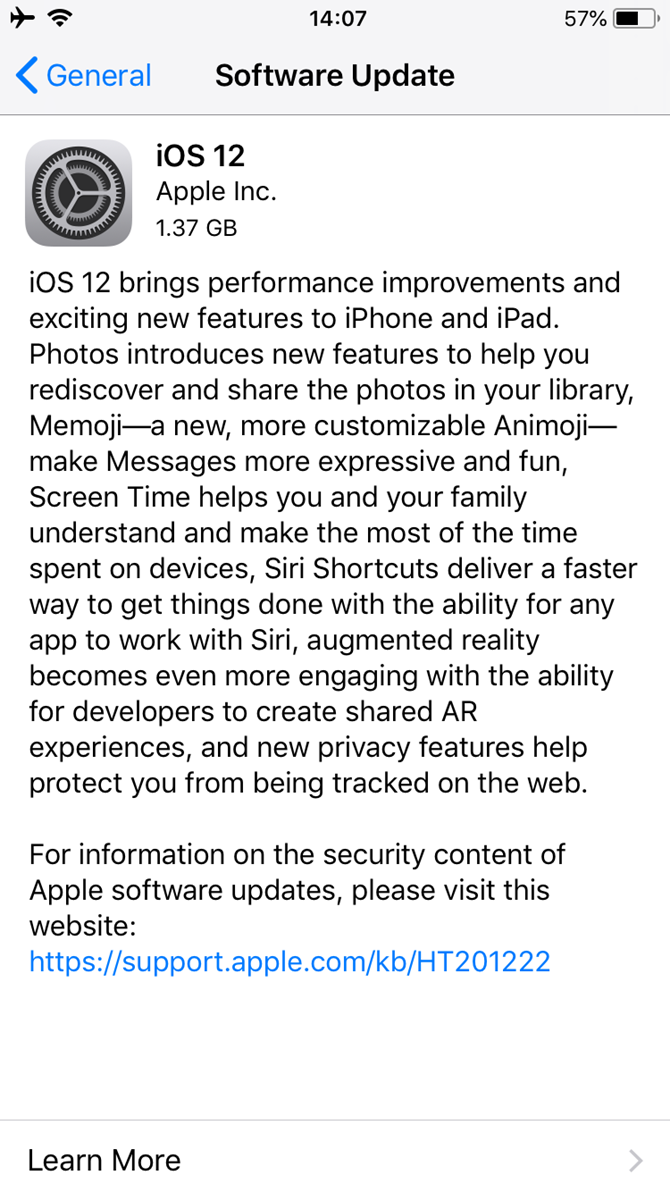
If your phone has not automatically downloaded the update, tap Download and Install. This shows Install Now instead if it’s already downloaded. A dialog will appear asking you to confirm by tapping Install once more.
Should you keep getting errors about verifying the update, you may need to re-download it. You can remove the update data by going back to General in the Settings app. Tap iPhone Storage, then find the iOS update in the list. Select it and choose Delete Update, then you can try to re-download it.
Updating via iTunes
Even if your phone is set to sync via Wi-Fi, you need plug it in using a Lightning cable before you can update with iTunes. Once you connect your phone to your computer open iTunes and the device indicator will pop up again. Click on it and select your phone.
On the device page, click Check For Updates (or Update if it’s already found one). A popup will notify you of the new version; click Download and Install. If you use a passcode, you need to enter it before applying the update.

Restarting and Fixing Update Issues
Regardless of the method you used, your phone has to restart to apply the update. This screen shows an Apple logo with a progress bar. Once that finishes, your phone goes to the Hello screen like a new setup. From there, you may need to tap through some menus to agree to any changes and re-enter iCloud info.
If your phone hangs at the Apple logo, you may need to restore. Try pressing a button on your phone; you’ll see a message if the update is still working. If it’s unresponsive for some time (more than 30 minutes or so), try force-restarting it.
After that, reboot your phone. If you get a screen with the iTunes logo and a USB cable, you’ll need to restore it. Connect it to iTunes again and click Restore iPhone on the same screen where you update your phone. Sometimes the update will continue from where you left off and complete as normal after a forced restart.
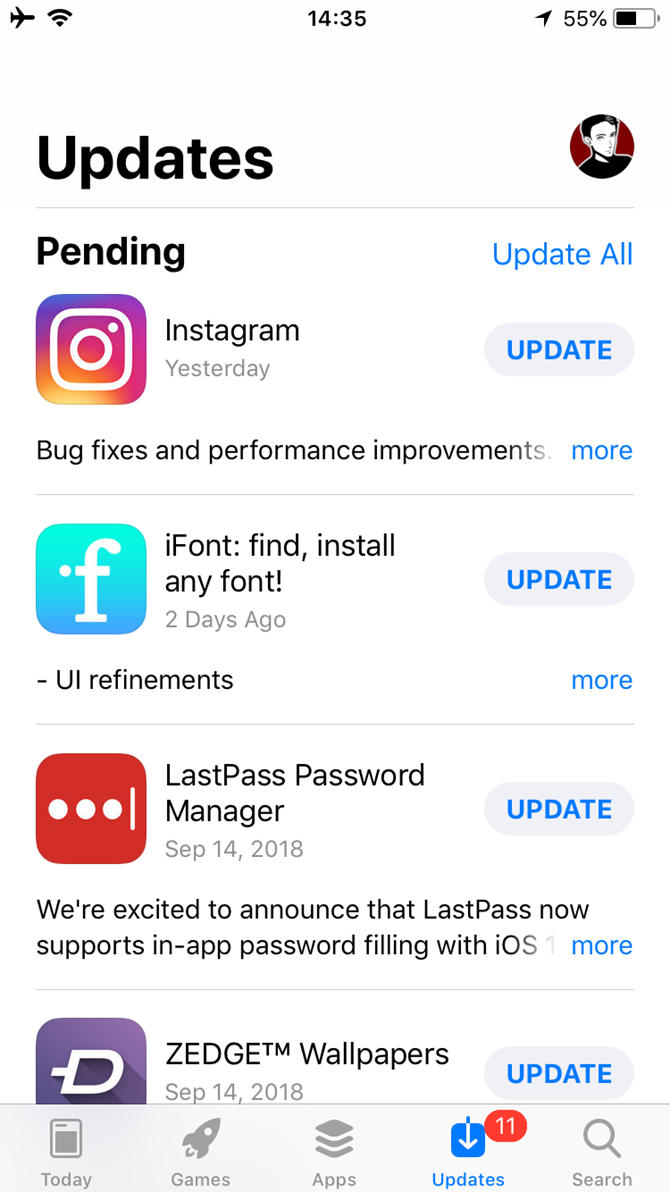
How to Update iPhone Apps
If you just need to update the apps, you can do this on your iPhone. Apple removed the ability to manage iOS apps through iTunes in a recent update.
Open the App Store on your iPhone. Tap Updates in the bottom navigation bar, then on the next screen tap Update All.

Your iPhone Is Now Up-to-Date
Apple lets you update iOS however you like. In most cases, updating right from your phone is the most convenient. You should only need to update via iTunes if you’ve had an issues with your iPhone.
Now that you’re all up-to-date, why not check out what’s new in iOS 12?
Image Credit: PIMPAN/Shutterstock
Read the full article: How to Update Your iPhone: iOS, Apps, and Data Backups


