

How to Install Fonts on iPhones and iPads
Posted by BEN STEGNER

Did you know that your iPhone or iPad is capable of installing and displaying different fonts? While you can’t change which fonts are used by the OS itself, you can still use custom fonts in non-system apps like Microsoft Office, iWork, and Adobe CC.
You just need to download and install the font you want to use, then select it in the appropriate app. Here’s how.
How to Install Fonts on iPhones and iPads
- Install the free iFont app, which makes it easy to install fonts.
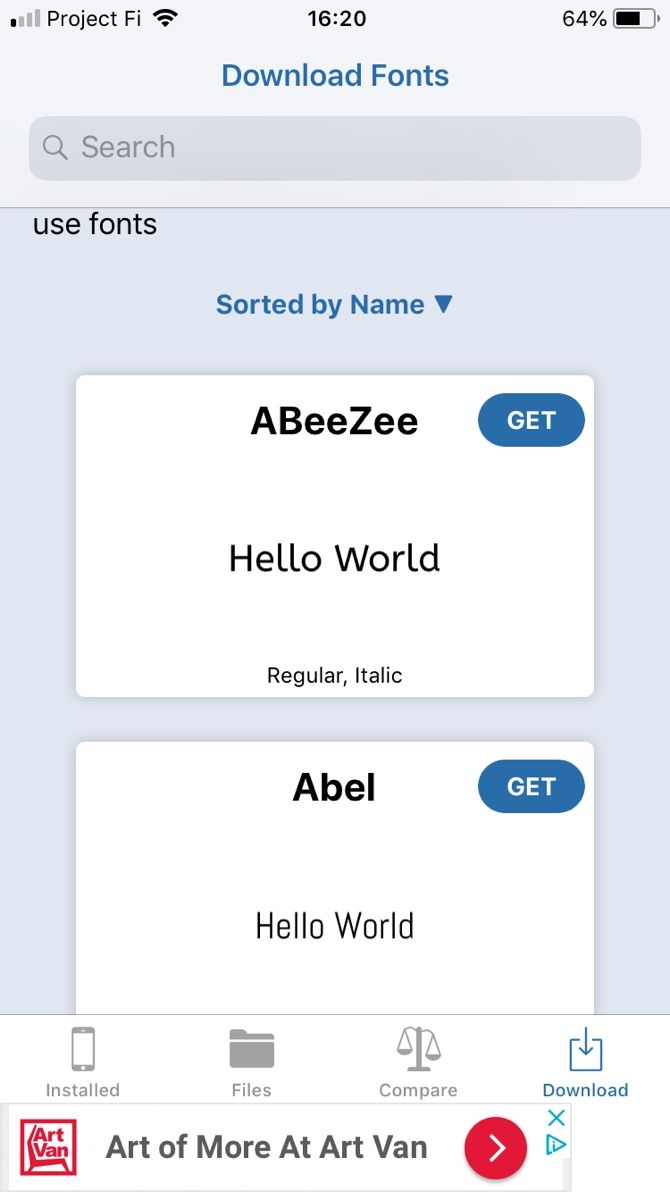
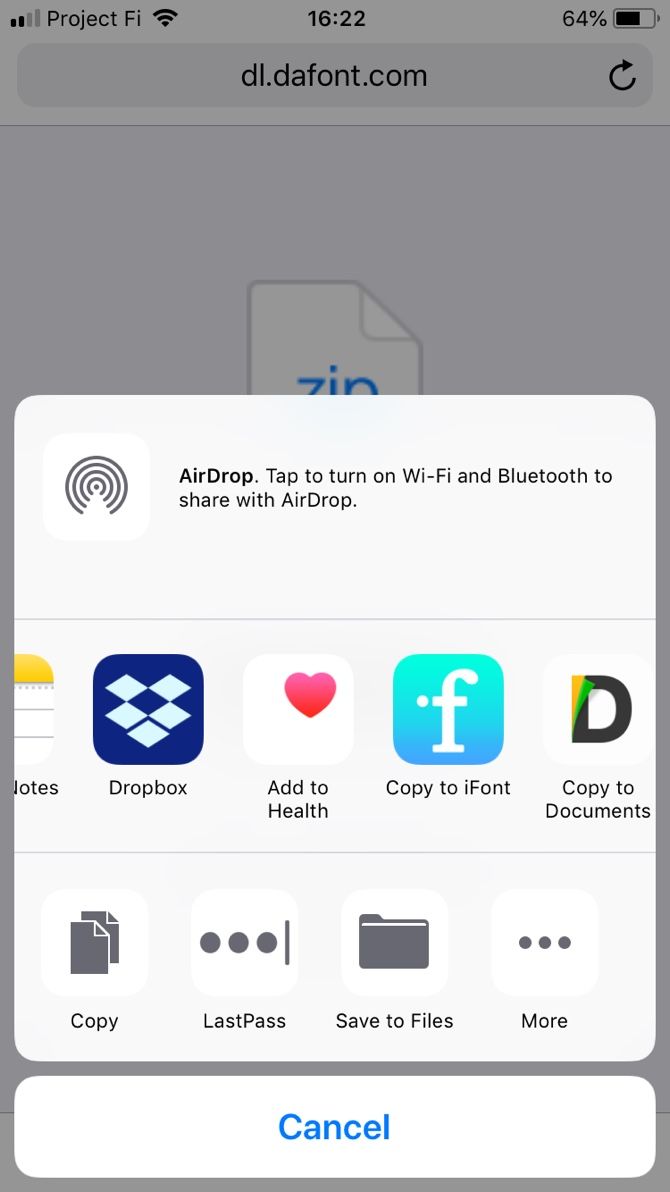
- Next, download the font you want. You can tap the Download tab on the bottom of iFont to access free Google fonts. If you don’t care for any of those, visit a font download site in your browser and select the Download button for the font you want. Tap Open in iFont if that shows up, or More > Copy to iFont to open it from the sharing menu.
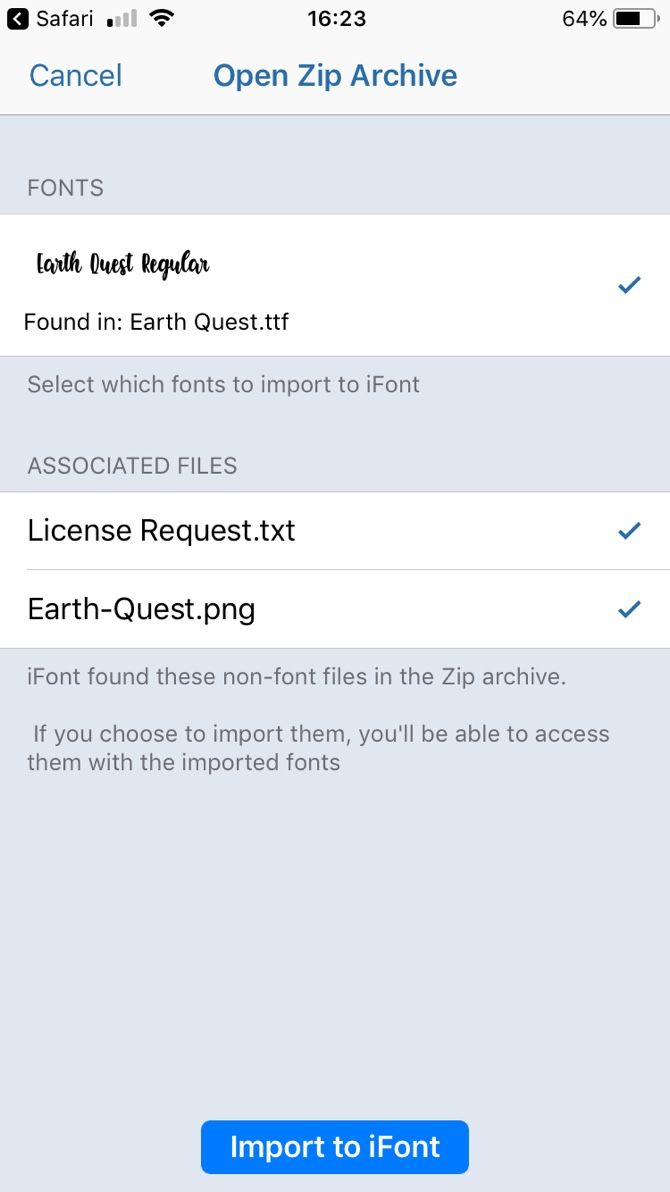
- iFont will open and prompt you to grab the contents of the file you downloaded. You can uncheck Associated files like license agreements and cover images if you don’t want them. Fonts will appear at the top in OTF or TTF format. Tap Import to iFont.
- Tap the Files tab at the bottom. You’ll see all the fonts you’ve imported into the app. Hit Install next to one.
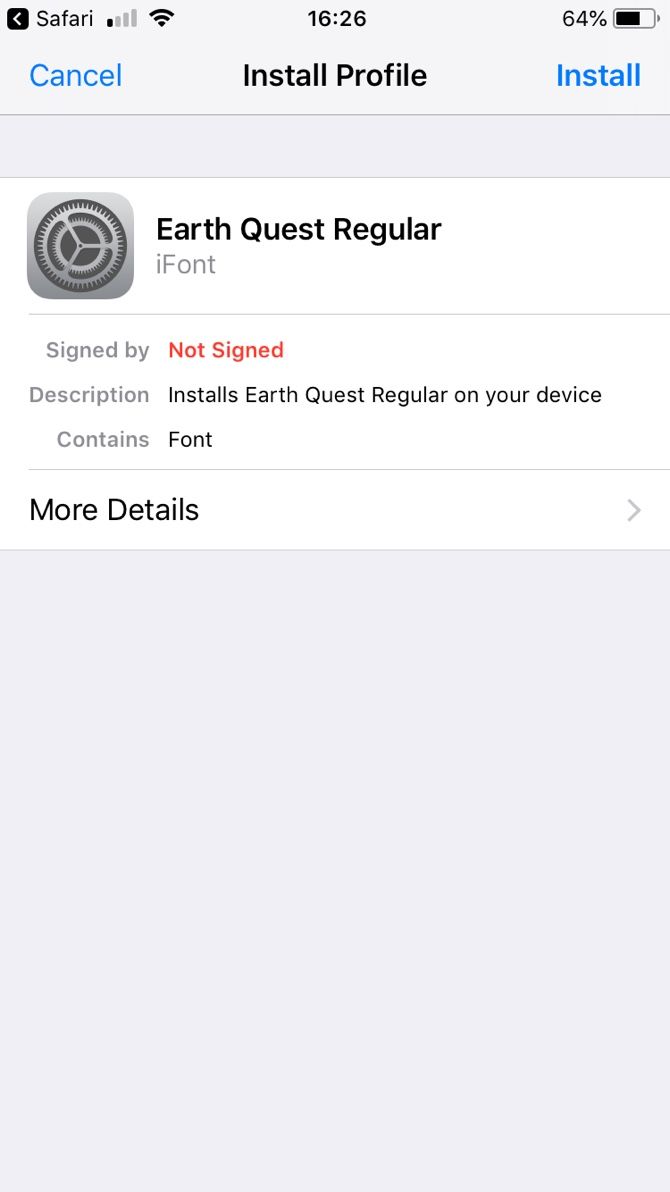
- Your iPhone will warn you that the app wants to open Settings to show you a configuration profile. This is normal; tap Allow.
- On the Install Profile screen, tap Install and enter your passcode. You’ll see a warning it’s not signed; tap Install once more, then Done.
- Now you’ve installed the font and can use it anywhere! Check the list of fonts in whatever creative apps you use to find it. If you don’t see it, that particular app might not support custom fonts.
- To remove a font later, go to Settings > General > Profiles. Tap the font you want to delete and choose Remove profile.
For more like this, check out tweaks everyone should make to their iPhone.
Read the full article: How to Install Fonts on iPhones and iPads

Collection 2019
Sale 70% Off
Title for image

