

How to Automatically CC or BCC Yourself in Outlook and Gmail
Posted by NANCY MESSIEH
CCing and BCCing yourself on emails can be a useful way to remind yourself of important emails or to keep your colleagues in the loop. Gmail and Outlook users can easily automate the process so that, if the need arises, all your emails are automatically CCed or BCCed.
This method isn’t for everyone and you might find that it could make for a messy inbox. That said, Outlook users also have the option to be more selective when choosing when to use the feature, but still keep it completely automated.
How to Automatically CC or BCC Yourself in Gmail
To automatically BCC or CC yourself (or any other email address for that matter) in Gmail, you will need to use a browser extension. The feature is not native to Gmail itself, and a lot of the third party extensions require pretty extensive permissions to access your email.
Auto BCC for Gmail & Inbox requires access to read and change all the data on the websites you visit. BCC Me for Gmail (which is not yet compatible with the new Gmail) requires access to read and change data on Gmail as well as access to your entire browsing history.
The extension with the least permissions required is Auto BCC for Gmail from CloudHQ, which unlike the other two, does not access browsing history outside of the Gmail domain.
Once the extension of your choice is installed and has access to your Gmail account, you can create a rule using the following steps:
- Click the Compose button to create a new email.
- Click the envelope icon next to the send button.

- In the dialog box that opens, click Add new rule.

- Under When emails are sent from, you should see your email address already filled in. In the dropdown menu directly beneath that select to everyone, but not to and leave the field blank. Under then automatically select BCC (or CC if you prefer) and enter your email address.
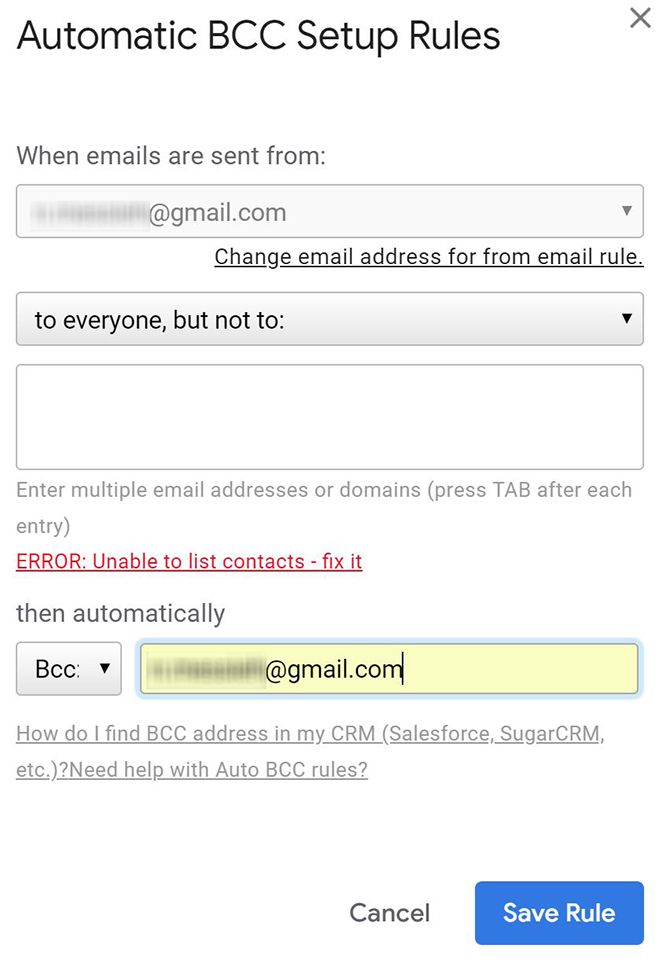
- Click Save Rule.


If you decide you no longer want to use this extension, you can uninstall it and revoke its access to your Gmail account in your Gmail Sign-in and Security settings, which you can reach at myaccount.google.com/permissions.
If you’re not a Chrome user, or don’t want to grant a third-party access to your email, a good workaround for automatically BCC another person is to use Gmail’s Filters and Forwarding features:
Add the other person’s email address as a forwarding address in the Forwarding and POP/IMAP tab. (They will need to click an automatically generated link sent from Google before the forwards start.) And then create a new rule with Gmail Filters where all emails sent from your address are automatically forwarded to the second address.
How to Automatically CC or BCC Yourself in Outlook
Outlook users can automatically CC or BCC themselves using the email program’s Rules feature.
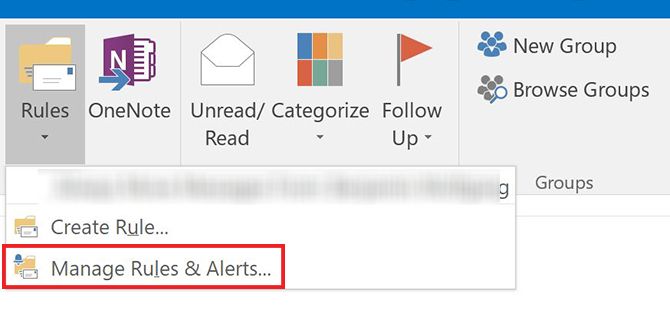
- On the Home tab, click the arrow under Rules and click Manage Rules and Alerts.
- Click New Rule.
- Under Start from a blank rule, click Apply rule on messages I send and click Next.

- If you want to apply this rule to all your sent emails, just click Next again. If you want to be more selective, you can use the criteria listed to select only certain types of emails to add this automation to.

- In Step 1 of this window, select Cc the message to people or public group. In Step 2, click the people or public group link. In the To field, enter your email address. Click Next. (If you would rather not publicly CC someone, you can mimic a BCC by checking Move a copy to the specified folder in Step 1, and clicking the Specified Folder link and selecting your Inbox.)

- This step is only necessary for those of you who prefer to use the CC option: Enter your email address in the To field.

- Again, you can add optional exceptions if there are certain emails you don’t want to apply this rule to.

- You can then enter a name for your rule, and make sure that Turn on rule is checked.


There’s plenty more you can automate when it comes to your email, including automated responses, out of office replies, and much more.


